How a Violin is Made
Varnishing, assembly, and then some
The white violin
Once the top plate, bottom plate, side plate, and neck have been shaped and assembled, you have a white violin. Now it is ready to move on to the varnishing and assembly process.

A white violin before the neck is attached
Repeated varnishing, drying, and polishing
This process is sensitive to dust, so it is important to keep the workshop clean.First the wood is treated with a filler to prevent the varnish from being absorbed, and then coloured varnish is applied in layers. After each layer of varnish is applied, it is dried and polished. This process adds a sense of clarity and depth to the violin. In the finishing process, the surface is carefully polished to give it a glossy finish.
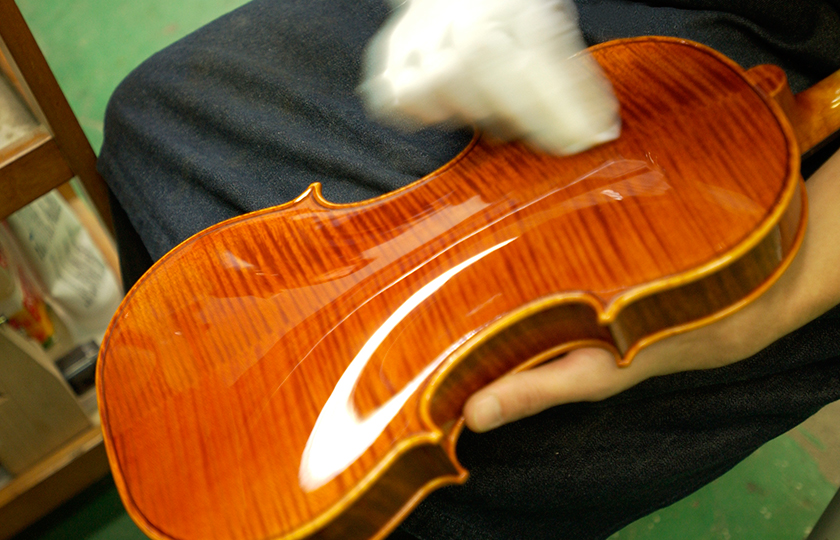
Polishing between applications of varnish
Install the sound post, and it is complete!
Next we move to the assembly process. The fingerboard and nut are attached first, and the bridge is put into place while the strings are being attached. The sound post is then installed, completing the assembly.
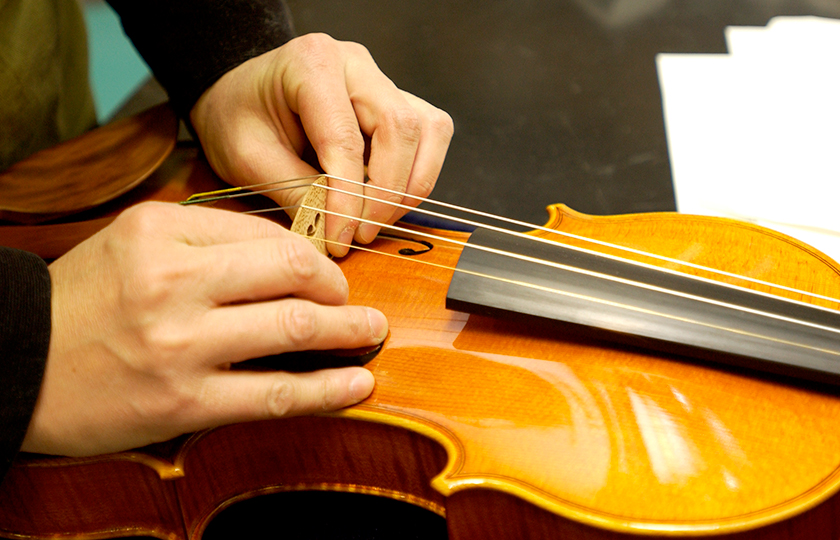
The bridge is installed while stringing the violin.
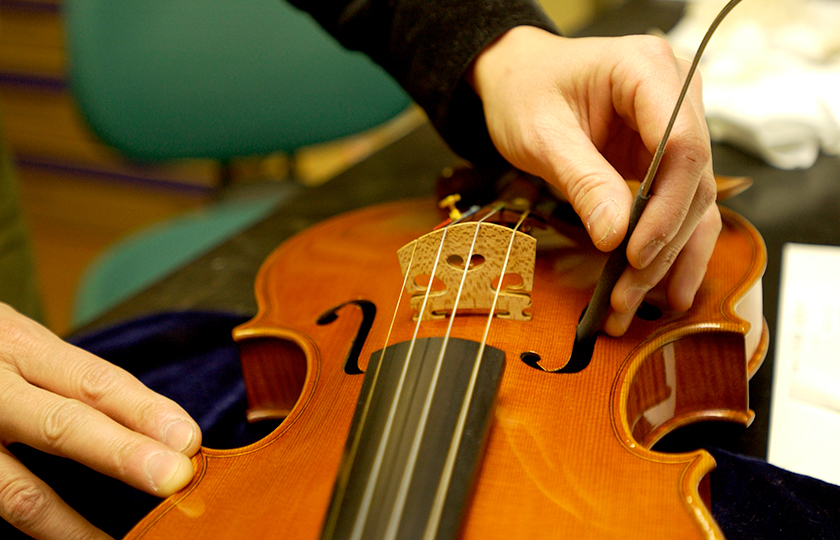
Installing the sound post through the f-hole
Using a special tool designed for this purpose, the sound post is installed through the f-hole. The sound post is not just sandwiched between the top plate and bottom plate. It must be installed in the proper position and be perfectly perpendicular to the plates, and it must also be positioned properly in relation to the bridge. In some cases, the sound post is tapped, and the resulting sound indicates whether it has moved or not.
Musical Instrument Guide : Violin Contents
Origins
Structure
How to Play
How the Instrument is Made
Choosing an Instrument
Care and Maintenance
Trivia
- The f-hole used to be a C-hole or S-hole
- Why the f-hole?
- Violinists must bow to the horse
- Steel strings or gut strings? That is the question
- Is the chinrest the unsung hero of the violin?
- Most violin varnishes are also medicines
- Violin masterpieces: Solos I
- Violin masterpieces: Solos II
- Violin masterpieces: Solos III
- Violin masterpieces: Concertos I
- Violin masterpieces: Concertos II
- Viola masterpieces: Chamber music
- Viola masterpieces: Concertos
- Cello masterpieces: Concertos I
- Cello masterpieces: Concertos II
- Cello masterpieces: Solos
- Contrabass masterpieces: Concertos
- Contrabass masterpieces: Chamber music
- Orchestral masterpieces featuring the contrabass
- What do you call the part on the bow that you hold?